


SoloLite is an integrated and compact software, compatible with 1C and 3C SmartSolo devices, for scripting the recording parameters, data download and data export. Designed for active and passive seismic data acquisition and management, it supports various data formats including SEGD, SEGY, SAC, and MiniSEED. Data can be output as continuous receiver gathers or shot gathers, and the record length can be customized as required.
When managing a project with SoloLite, it is very important to configure the data storage. It is recommended that project, raw data, and result data directory are all on the same disk.
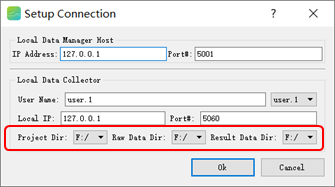
Figure 1. Setup Connection Window
Using an External Drive:
When a user sets the raw data directory to a portable external HDD (Hard Disk Drive) or SSD (Solid State Drive), and the project directory was not set to be the same drive, if that external drive is then moved to a different computer, you will no longer be able to access or view the data, because both the project files and raw data are needed.
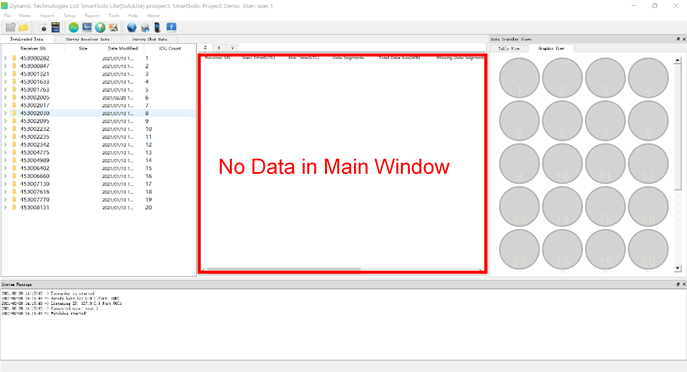
Figure 2. No Data in Main Window
When the Prepare button is pressed in the data export window, the system message log will show an error message. No IGU details will be displayed in the data output window.
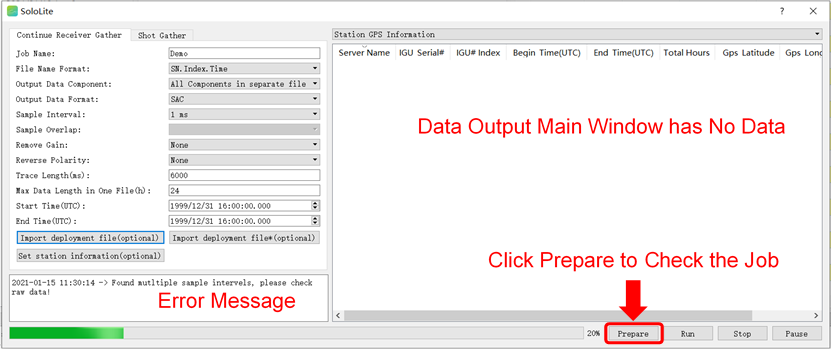
Figure 3. Error Message after Preparing Job
Solutions:
1. With the project and raw data directory paths correctly configured, Click the Reanalysis icon on the Tool Bar menu, and reanalyse the data.
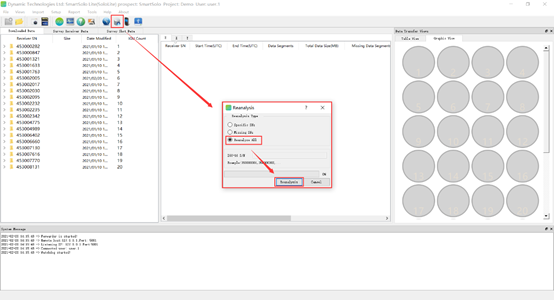
Figure 4. Reanalysing Data
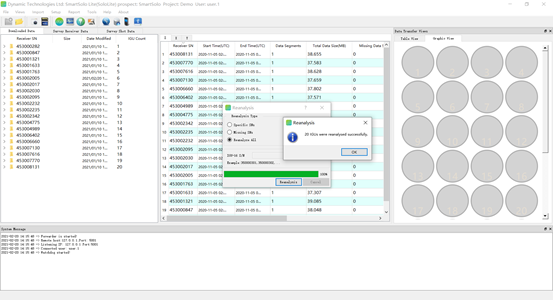
Figure 5. Data has been Successfully Reanalysed
2. Right click on the data output main window under the Station GPS Information tab, and select “Update gps data”. The updated IGU data information will be displayed.
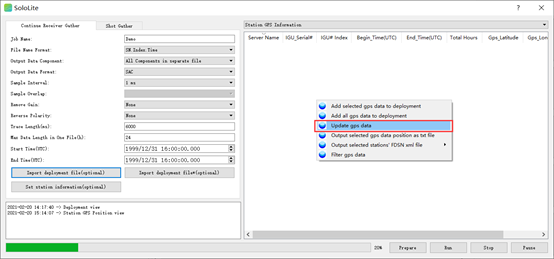
Figure 6. Updating Data
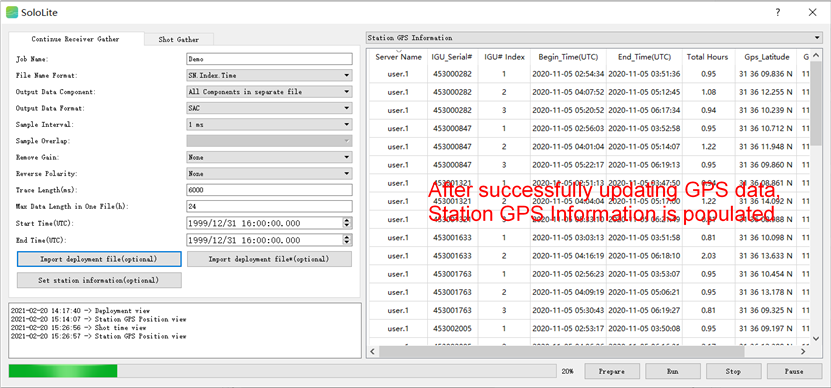
Figure 7. Successfully Updated GPS Data
3. After the data update has finished, click Prepare and check the output job. The system message log window will show what outputs were prepared. The data is ready to export.
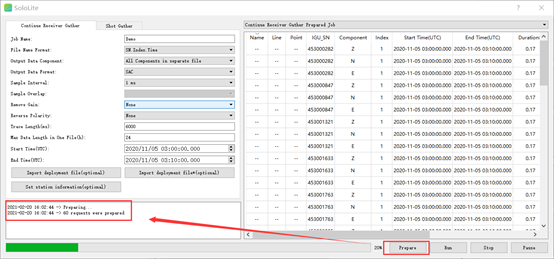
Figure 8. Output job preparation has been successful
